How to prune orchids correctly
Do you have some orchid plants at home? Have you ever wanted to prune them but weren't sure how to go about it?
Then this article is for you! We'll look at why pruning orchids is important, when and how to do it properly, what tools you need for a successful pruning, and even give you some tips to make your job as easy as possible.
Why should you prune your orchids?
Although some people consider it part of orchid care, it is not absolutely necessary to prune orchids. Orchids are generally plants that remove unnecessary parts of their own. Moreover, with orchids, pruning is not guaranteed to result in more lush blooms or faster growth.

But it can still be worth it: If your plant is sick and infested with pests, all diseased parts of the plant must be removed so that the plant can recover. Even healthy orchids are often cut for space or aesthetic reasons - but this is not advisable.
Cutting orchids – the right time
When it comes to choosing the right time to prune your plants, you should take a close look at them.
The right time for cutting depends primarily on the type of plant. If your plant has finished flowering, you can pull out your cutting tool when you see completely dead flower shoots. If your orchid has shed its leaves but the shoot is still green, you should wait.
The same applies to leaves and roots: only cut what is rotten, diseased or dried out.
The right cutting tool
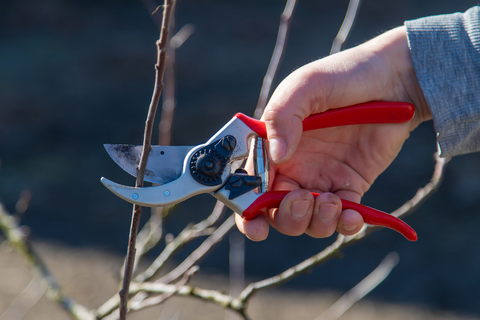
The right cutting tool is crucial for pruning your orchids. Use a sharp, disinfected knife, plant scissors or a scalpel to make precise cuts without squeezing or damaging the plant.

To do this, you can hold your tool in a flame or boiling water for a moment, or wipe it with methylated spirits. This will also prevent pathogens from finding their way into the plant's tissue via the cuts.
How to prune orchids correctly
The right cut helps your orchids to use their energy more specifically on flowering and growing and prevents infections and pests.
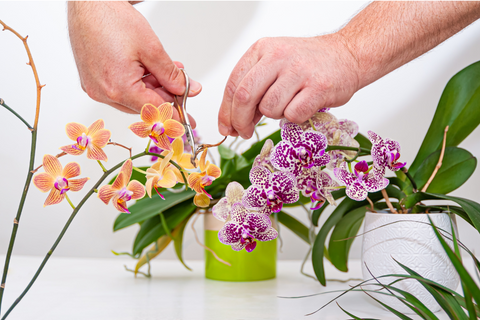
Cutting orchid flower shoots
Orchids, like other plants, are divided into single-stemmed and multi-stemmed plants. The small but subtle differences that exist when cutting these orchids are explained in the following section.
Single-stem species
You can tell that single-stemmed orchid species have finished flowering because all the flowers fall off the flower stem on their own. Since no further flowers are usually expected from these species, you can cut the flower stem right at the base.
The safest option is to wait until the flower shoot is brown and dried out. This way you know that the shoot no longer contains any important nutrients. In addition, pulling out a completely dried out shoot is the healthier choice and no annoying stump is left behind.
Multi-branched species
With orchid species that have multiple shoots, however, more flowers may develop after flowering. Even if the orchid doesn't look particularly attractive once it has shed its flowers, you should still wait. If the flower shoot is still green but has shed its flowers and no more flowers have formed after some time, you can cut it. To do this, place your disinfected cutting tool over one of the nodes - preferably over the third . The so-called nodes or eyes are the thickenings that you find at regular intervals on the flower shoot.
Now it is possible that some time after the main flowering, the plant will develop a new side shoot from this node and flower again. This so-called remontant process can take place up to three times. If this is not the case and the flower shoot turns brown instead, you can simply cut it off as far down as possible so that a new shoot and thus a new flower splendor develops from the stem of the plant.
Exception: Paphiopedilum Pinocchio
The situation is different with the lady's slipper: this particularly flowering orchid species keeps forming new flowers on the stem. For this reason, you should not cut off the flowering shoot of this plant, but simply wait - it's worth it!
Cutting orchid roots
Keep your plant in a transparent pot so you can keep an eye on the condition of the roots at all times. This way you can avoid waterlogging and detect root rot early.
If you notice symptoms of disease in the roots, do not hesitate to remove the affected areas. This will protect your orchid from further bacterial infections. Dried or hollow roots can also be removed. However, healthy, green roots should not be cut off, as they supply the plant with important nutrients and water.
Even though many aerial roots can be unsightly, they fulfill important functions because they give the orchid support and supply it with important nutrients. Therefore, you should also leave the roots that grow above ground alone as long as they are not mushy or dry.
Cutting orchid leaves
Even if the leaves of your orchid have visual defects, you should not simply cut them off. If your plant has been sunburnt, for example, the healthy parts of the leaves can carry out photosynthesis and thus provide the orchid with important nutrients.
As soon as an orchid no longer needs its leaves, the leaves usually slowly die and eventually fall off on their own.

For this reason, cutting off the orchid leaves is not advisable and can even damage the plant. The cut areas can provide an entry point for germs that can cause permanent damage to the orchid. The most you can do is pull on dying leaves a little to remove them. But it is even better to just be patient and let nature take its course.
Cutting orchids – tips
It is now clear that pruning orchids is an important part of orchid care and is not a simple matter of cutting them off. In the following section, we have therefore summarized a few helpful tips for you.
Repotting and cutting
The orchid should be repotted every one to two years so that the plant receives new substrate. This is a good opportunity to take a close look at the plant. If you notice root rot or other symptoms of disease, you should remove the affected parts of the plant so that it does not suffer any further damage.
Anti-infective agents
As mentioned several times, cutting the plant always means that pathogens are given a path into the orchid through the cuts. It is therefore advisable to treat the relevant areas with anti-infective agents after cutting in order to inhibit or completely prevent infection. These agents include, for example, activated charcoal powder, sulphur powder or high-quality cinnamon powder.
Cut carefully
Even if it should actually be a given: When cutting your orchid, always make sure that you do not damage any other parts of the plant. You should only cut off diseased flower parts or those that have obviously withered. You should avoid healthy roots and leaves. Every cut on the plant always means the risk of letting in pathogens.
Cutting orchids – FAQ
Finally, we have listed and answered the most frequently asked questions about cutting orchids.
Can you cut the aerial roots of orchids?
You should never cut off the aerial roots of orchids too quickly! Since they support the orchid and the roots supply the plant with the necessary nutrients and water, they should only be cut off when they are either dry and hollow, or when they are rotten.
Can an orchid survive without roots?
Yes, there is still hope for orchids without roots. If the roots are rotten, for example, you can cut them off completely and then treat all cut areas with an antiseptic and a fungicide. With a little luck, the roots will start to grow after a while.
How do you cut orchid roots?
You should only cut the roots of your orchids when necessary. Rotten roots and those that are completely dry and hollow should be completely removed with a sterile knife or plant scissors.


Leave a comment